Loads More Options...
UK Parcel Delivery
- Drop-Off Services
- Collection Services
- Same-Day Delivery
- Next-Day Delivery
- 2 to 3 Day
- 3 Days Plus
- Pallet Delivery
- Special Delivery
- Letters & Small Parcels
- Heavy Parcels
- Large Parcels
- Small Parcels
- Postage Costs
- All UK Delivery Services
- Send a Parcel
- No Printer Courier Services
- Advice on My Parcel Delivery
International Parcel Delivery
Our Range of Courier Services
About Parcel2Go.com
Parcel Delivery Tools
Choose Your Country
How to link your PrestaShop account
In this guide, we’ll give you a breakdown of how to link your PrestaShop account.
Scroll down if you'd like a step-by-step guide.
Step 1
Go to the ‘Account’ menu within the top navigation and click on ‘Linked Account’.
Step 2
Next to the PrestaShop logo click ‘Link New Account’.
If you know your ‘Shop URL’ and ‘API Key’, you can enter these into the fields provided and click ‘Link My PrestaShop Store’. If you need help finding this information, continue on to Step 3.
Step 3
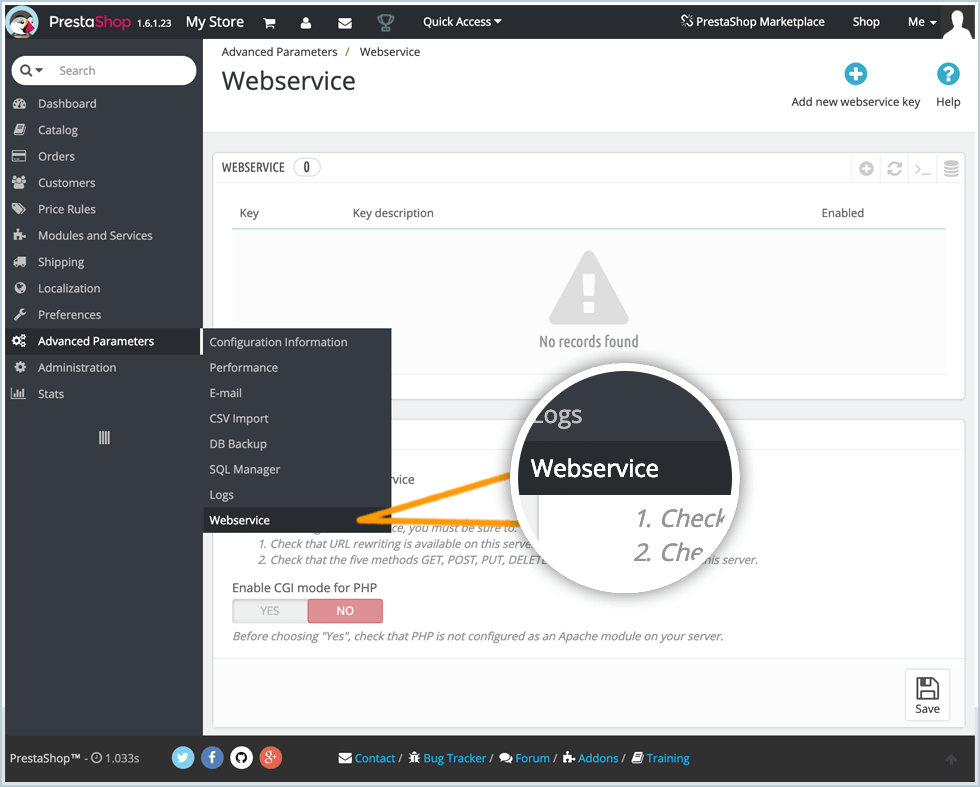
To link your store you will need to have a configured API key. To set this up you will need to go to your PrestaShop dashboard and click on ‘Advanced Parameters’ > ‘Webservice’.
Step 4
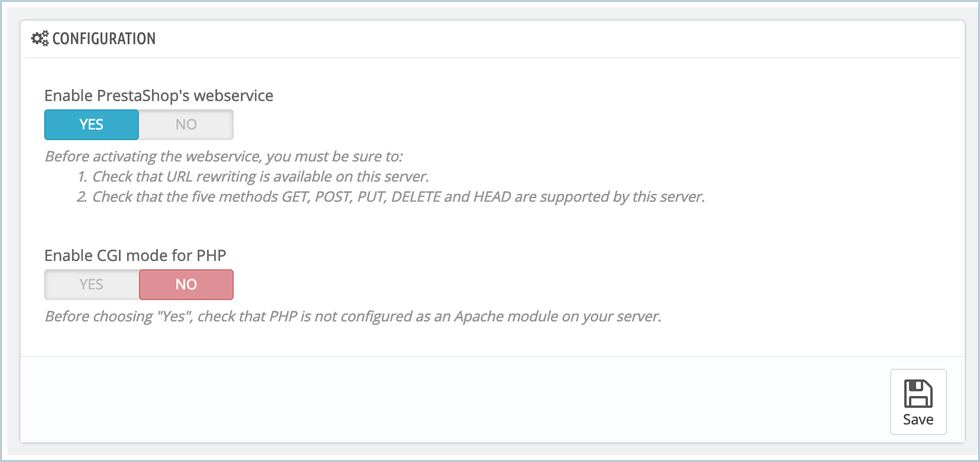
Ensure that ‘Enable PrestaShop's Webservice’ is turned on.
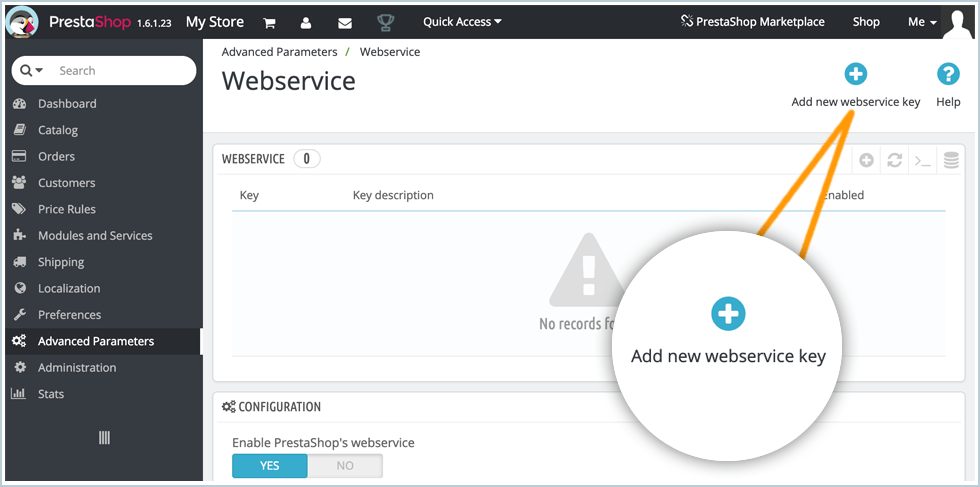
Click the ‘Add New’ button.
In the permissions table, make sure to select View (Get) for all of the following:
- addresses
- countries
- order_details
- order_histories
- order_states
- orders
- products
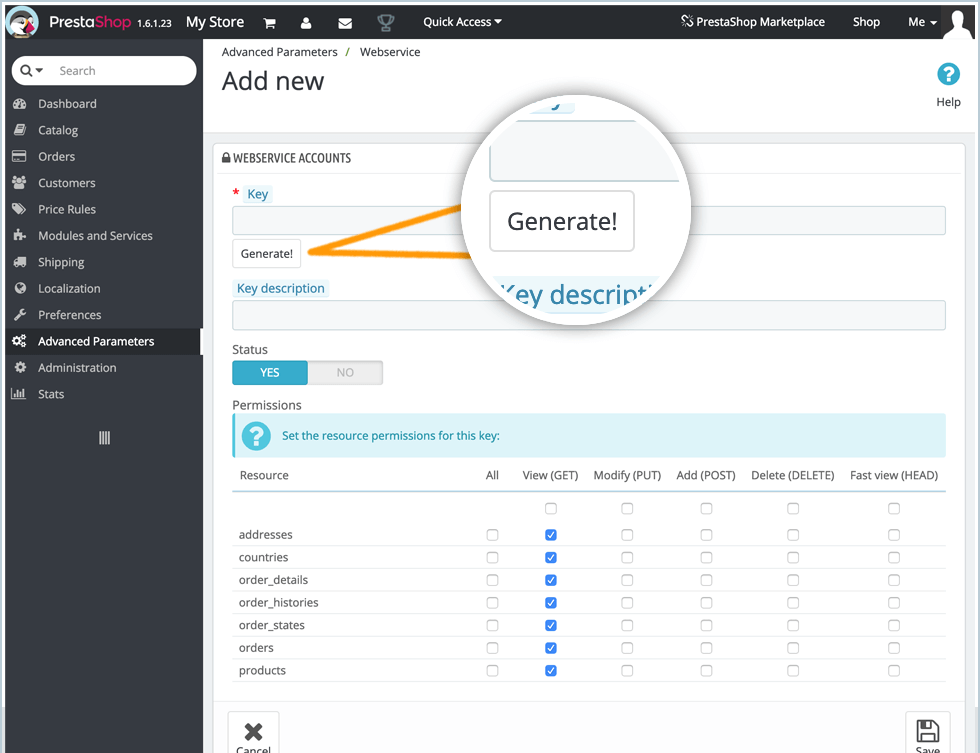
Click ‘Generate’ at the top of the form to create the API Key. Take note of this key. Click ‘Save’.
Step 5
Enter the API Key along with your URL on the integrations page. The URL field does not need the http:// or https:// parts. For example the URL should be: www.parcel2go.com and not https://www.parcel2go.com
Step 6
Once you've added your shop, you will see it displayed on the linked accounts dashboard.
Select ‘Configure’ next to your shop.
You will now see a list of all the order process statuses that you defined within PrestaShop. Select the statuses that you want Smart Send to bring in.
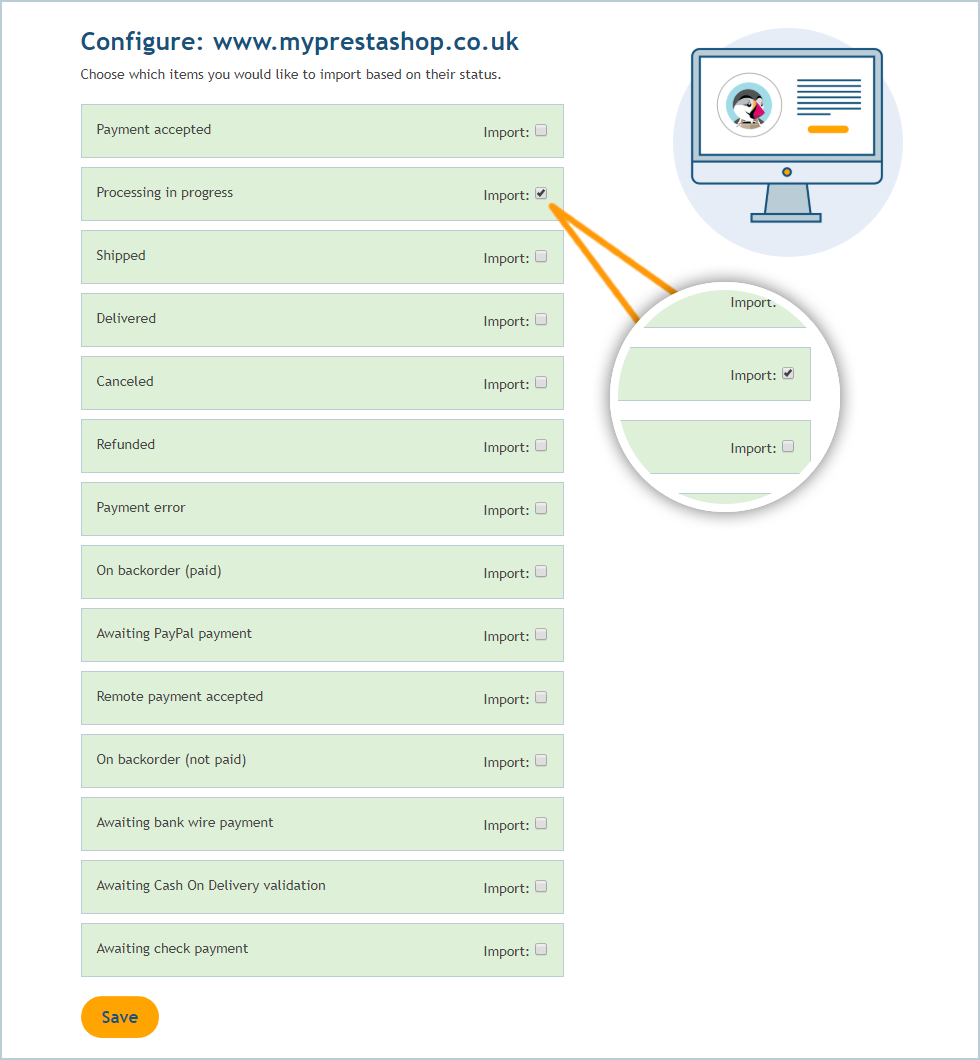
In the future, if you ever change the names of these order process states, you will need to return to this page and update the details.
You have successfully linked your PrestaShop account.
Please Note:
Items will only be imported into Smart Send when you have configured your statuses. Once you have linked your account, click on ‘View Accounts’ and then ‘Configure’ (next to your linked shop).


.svg)